
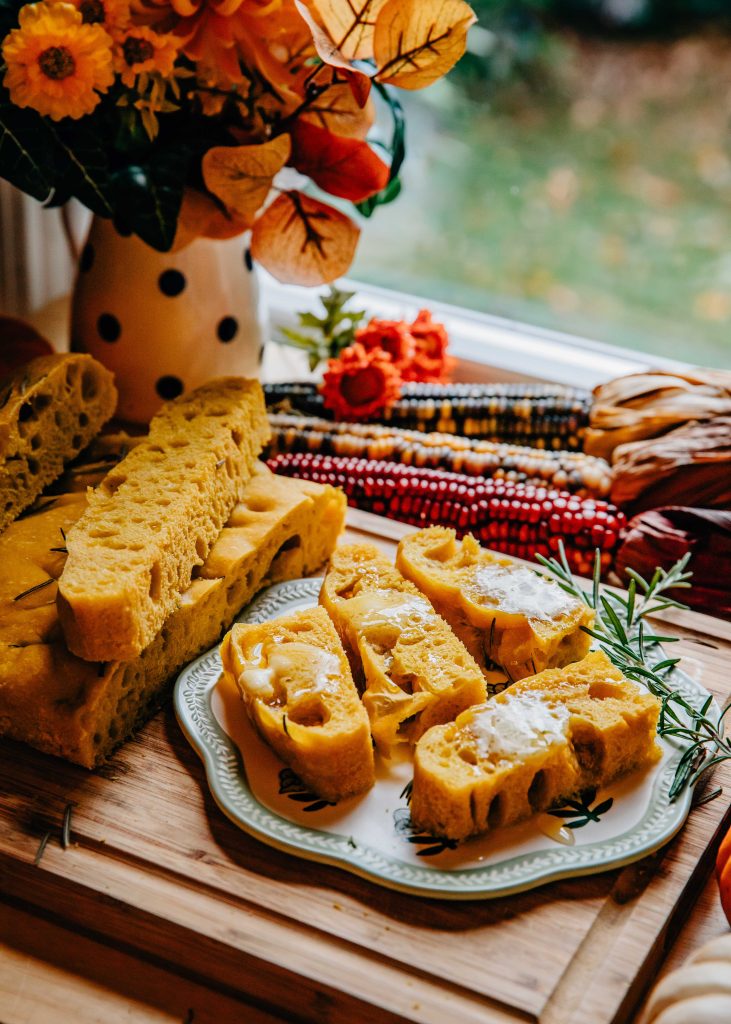
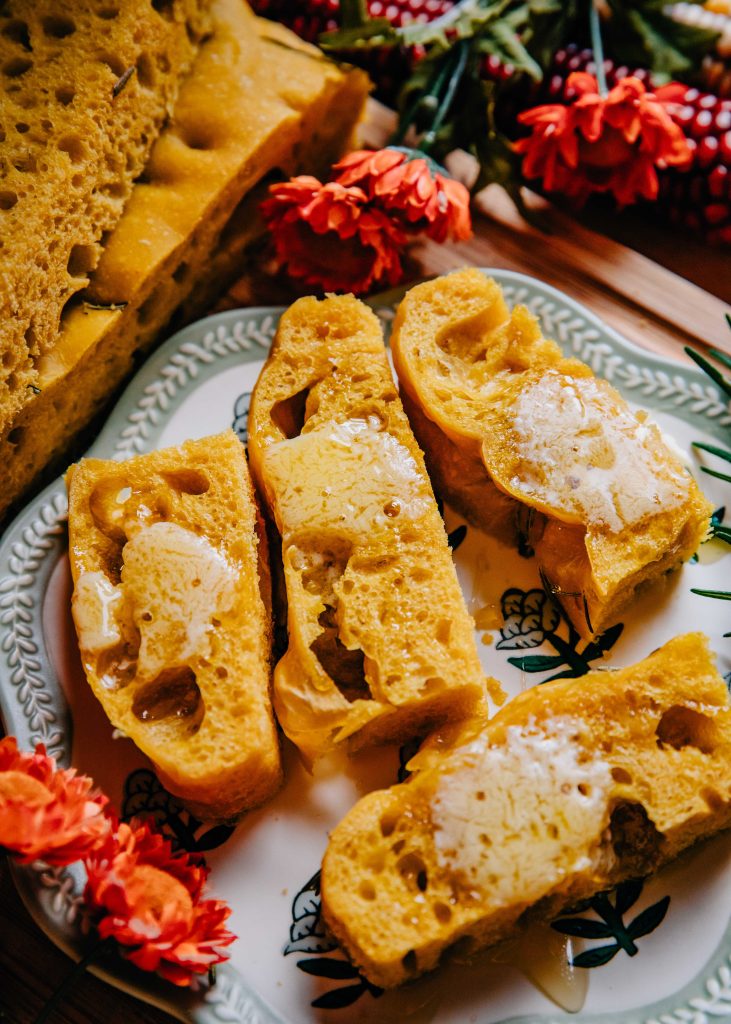
This Rosemary Pumpkin Focaccia is fall in a bread – cozy, warm, and perfectly spiced! Your house will smell HEAVENLY while you’re baking this bread. And with my foolproof recipe, you can be sure to come out with a crowd-pleasing bread every single time!
Listen, I will be the first to admit that I am not a baker. I’ve always had a sixth sense when it comes to cooking, but baking is another matter entirely. With cooking you get to be creative and boundary-less; whereas with baking you have to be precise. But I have been DETERMINED to get a Pumpkin Focaccia recipe ready for the blog, and now here it is!
There are few greater joys than the scent of bread baking in the oven; especially when rosemary is involved. And then of course we have pumpkin, a classic fall staple!! I made this Rosemary Pumpkin Focaccia for my in-laws the other day, and they all LOVED it. It was such a huge hit, and I know you’ll love it too! :) Enjoy!
For more delicious fall pumpkin recipes, try these Pumpkin Spice Margaritas, this Pumpkin Cauliflower Gratin, or this Pumpkin Minestrone!


Rosemary Pumpkin Focaccia
Ingredients
Step One
- 7 Grams Yeast 1 packet, or 2 1/4 tsp
- 57 Grams Warm Water 1/4 cup
- 21 Grams Honey 1 tbsp
Step Two
- 25 Grams Extra Virgin Olive Oil 2 tbsp
- 227 Grams Water 1 cup
- 113 Grams Pumpkin 1/2 cup
Step Three
- 500 Grams Bread Flour about 4 cups
- 2 Tsp Salt
For Topping
- 25 Grams Olive Oil 2 tbsp
- Fresh Rosemary
- Maldon Sea Salt
Instructions
Step One
- Add the yeast, the water, and the honey to a large mixing bowl, and stir. Let the mixture sit until the yeast starts to bubble, about 5-10 minutes.
Step Two
- Once the yeast mixture is bubbly, add in the water, olive oil, and pumpkin purée, and whisk together until evenly combined.
Step Three
- Then, add in the flour, and mix with the wet ingredients until a shaggy (messy / lumpy) dough is formed. The dough should be very soft and slightly sticky. If the dough is so dry that flour won’t fully incorporate, sprinkle in 1–2 tablespoons of water at a time. If it’s so wet that it won’t hold a rough shape, add 1–2 tablespoons of flour.
- Take another mixing bowl and spread olive oil on the inside using your hands. Add the dough to that bowl, and cover. Leave it in a warm spot for 30 minutes.
- After 30 minutes, stretch and fold the dough. Using wet hands (this is crucial – the dough will stick to your hands otherwise), reach under one side of the dough and gently lift it upwards until you feel resistance (you want to stretch the dough without tearing). Fold that stretched section back over itself toward the opposite side of the bowl. Turn the bowl a quarter turn and repeat the process on the next side, continuing until you’ve stretched and folded all four sides of the dough. This counts as one full “set.”
- Do two more sets of stretches and folds, then let the dough rest in the oiled bowl, adding more oil to the bowl if necessary.
- Cover the bowl with cling wrap or a damp towel, then put it in the refrigerator overnight, or for at LEAST 10-12 hours (or up to 24).
Step Four
- Take the dough of the refrigerator, and add it to a well-oiled baking tray. It will deflate a little bit. Do another stretch and fold set, then shape the dough into a rough rectangle (in a similar shape to the baking tray).
- Cover the tray with cling wrap or a damp towel, and let it rest for 1-2 hours, or until the dough re-rises to the edges of baking tray.
Step Five
- Preheat the oven to 400 degrees F.
- Drizzle about 2 tbsp of olive oil over the top of the dough. Then, using your hands, "dimple" the dough by pressing your fingers straight down into the dough to create indentations across the entire surface. Don't poke holes all the way through – just press firmly enough to create bubbles.
- Sprinkle crunchy sea salt or Maldon salt on top, then add on about 1/4 cup of fresh rosemary, using your hands to press it in to the dough.
- Bake the focaccia in the oven for about 20-22 minutes, or until the top is golden and just starting to brown.
- When done, remove from the oven and let cool slightly before taking it out of the pan.
- Cut into slices and enjoy!
Notes
- Baking disclaimer: From 2025 on, I will be posting ALL of my baking recipes in grams. I will still provide Imperial, volume measurements in the notes, but I HIGHLY recommend purchasing a kitchen scale. I have this one from KitchenAid (affiliate link) and it’s super, super easy to use. Baking with a scale is more accurate and much easier.
- You MUST use bread flour here, NOT all-purpose flour!
Nutrition

Rosemary Pumpkin Focaccia FAQs
How long does this focaccia last?
This focaccia will last, wrapped, at room temperature for about 4 days! In the fridge, it will last 1-2 weeks.
Does pumpkin focaccia come out the same as regular focaccia?
Both regular focaccia and pumpkin focaccia come out bubbly, chewy, and perfectly bread-y. However, because you add in pumpkin purée to this recipe, it doesn’t come out exactly like regular focaccia. Why would it? The chemistry is completely different!
I would say that pumpkin focaccia is more earthy (thanks to the pumpkin flavor). In addition, the texture can be a little denser (in a good way).
What flour is best for focaccia?
You must use BREAD FLOUR for this recipe, NOT regular all-purpose flour! Bread flour has a higher protein content than AP flour, which gives focaccia its signature chewiness.
What makes focaccia different than bread? What makes focaccia bread special?
What sets focaccia apart is its texture, flavor, and the way it’s prepared. Unlike most bread, the focaccia dough requires higher hydration (= more water). This gives it that signature bubbly texture and chewiness. It also contains a generous amount of olive oil – in the dough, on the dough, and under the dough. So olive oil quality matters here!!
What’s the best oil for focaccia?
Use a high-quality extra virgin olive oil for this recipe. The olive oil flavor does come through, so make sure to stick with one that you know you like!

P.S.
For more plant-forward recipes, dinner parties, and New England lifestyle inspiration, be sure to follow along on Pinterest, Instagram, and TikTok! If you make a recipe, please tag me in the photo and use the hashtag #wellandfull so I can see! I love seeing your creations!


Leave a Reply